 I really wanted to order the Mindy Weiss shoe applique but every time I went to order it they were either out of stock or discontinued which was a bummer. I finally got frustrated and decided to surf the net to see if I could find an easy tutorial to make my own. I didn't search long before I found great instructions here. Although I like her instructions I chose to go an easier route by using Crystallized™ Swarovski® flatback hotfix crystals and the Jolee's Hotfix Heating tool. It was not the most cost efficient way to go about it but they came out GREAT. Here are my instructions in case you want to try this:
Materials::
- Jolee's Hotfix Heating Tool ($10, I had a 50% off coupon)
- Jolee's Aquamarine Hotfix Crystals, ($4.99 for 42 count)
- Scissors (already had)
- A straight pen or needle
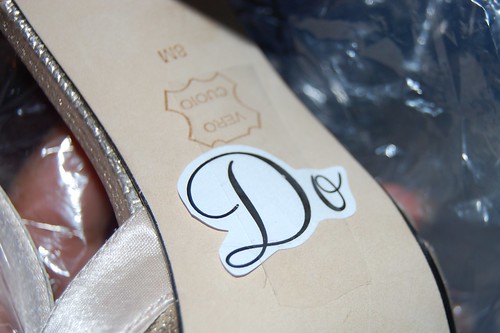
- Letters printed from Microsoft Word
- And of course your shoes!
Instructions::
- {Step 1}: Cut the printed letters out and taped them to the bottom of my shoes (I would not recommend this if the bottom of your shoes are leather like mine because the tape did leave a little residue on my shoes but I got it off)
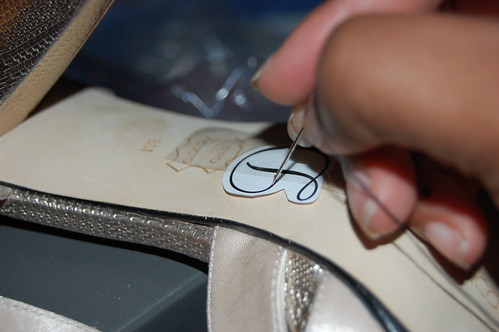
- {Step 2}: Next take the needle and gently poke holes through the paper tracing out the letter onto the bottom of your shoe.
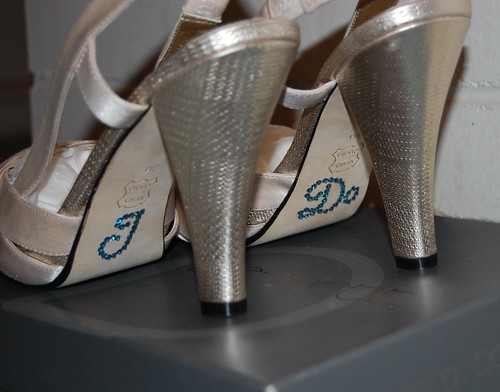
- {Step 3}: Use the hotfix tool and crystals as directed on the box to adhere the crystals on the shoe in the shape of the letters. This part is kind of tricky so pay close attention to the the directions.
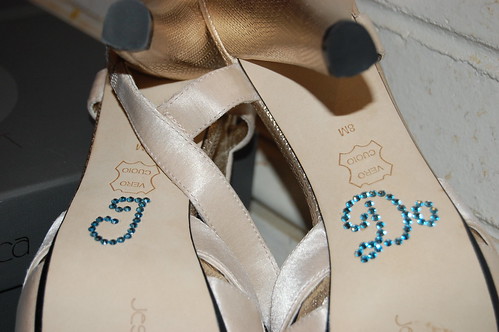
That is it and you're done! Although this wasn't the best for the budget I am going to use the hotfix tool for many of my DIY projects including my cake topper, bridal hoodie, invites, programs & menus so it was definitely be worth the money for me. BE SURE TO CHECK IN WEDNESDAY FOR A HUGE GIVEAWAY!!!!

I love them!! Your shoes are super cute too. I am def ordering those crystals. Great idea.
ReplyDeleteVery pretty! Thank you for sharing how you did yours... I plan to do this :) Love the shoes! :)
ReplyDeleteway to go - it looks amazing!
ReplyDeleteI love this idea. Great work! You are so crafty. I would love to do this myself. Thanks for sharing.
ReplyDeleteJeana, this DIY project is so great - it turned out wonderful! Awesome job :)
ReplyDeletethey turned out great!! blue rhinestones are sooo pretty.
ReplyDeleteLove the result. Glad you can use the tool for other project. I will make sure to check this entry again if i do this DIY.
ReplyDeletePS: I LOVE your shoes!
They came out fabulous! Great job!! :)
ReplyDeleteYour shoes turned out adorable!!! Great job!
ReplyDeleteWOW! they turned out so great! thank you for sharing this tutorial with us. it is definitely a great way to have your "something blue". i love it!
ReplyDeleteFabulous little tutorial. Thanks!
ReplyDeleteCute! Seems easy, too. You could do anything you wanted, too. I'm thinking initials!
ReplyDeleteBeautiful!! Thanks for the instructions, I was wondering how I was going to pull this one off! You're awesome!
ReplyDeleteSo cute! What a fun idea.
ReplyDeleteThis turned out beautifully!!
ReplyDeleteJeana - you are awesome, I am so glad I found your blog. Love this project!
ReplyDelete