D.I.Y Friday~ Super Market Flower Bouquets
>> Friday, November 21, 2008
I am definately a bride on a budget as most of you know, but when my fiance and I set our wedding budget I put aside a good chunk of money for a beautiful real flower bouquet. I knew that I wanted a full professionally made bouquet, and I thought that meant hiring a florist. Then while reading With This Ring I learned that Real Simple made it really simple {pardon the pun} to make your own beautiful "professional looking" bouquet out of flowers purchased from your local grocery store. All you need is a bouquet of supermarket flowers, floral stem wire, a few floral pins & some beautiful satin ribbon in your coordinating wedding color. For full details visit {Real Simple}.


Irises, Statis & Carnations::


Colorful Varied Bouquet::

 Read more...
D.I.Y Friday~Embossed Invites
>> Friday, November 14, 2008
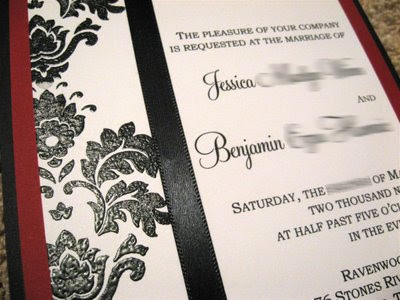
 Oh how I love surfing on Weddingbee.com. It's brides just like you and me, sharing weddings ideas, pictures & much much more! While surfing a couple of weeks ago I came across this gorgeous invitation made by the lovely Miss. Fondue. Like I mentioned earlier this week I want to make my invitations but I also want them to look professional and classy, this inivtation has all those qualities and more! Her instructions are easy to follow and I feel confident after going over them dozens of times I can make my invites look just as gorgeous with with my own little twist. Here are the instuctions, be sure to leave her a comment to let her know just how cute those invitations are.
Budget Centerpieces
>> Saturday, October 25, 2008
If you read my blog often, you know that I'm a DIY bride on a tight budget. I want beautiful centerpieces just like any other bride. I really don't want to use silk or artificial flowers so I have been on a search for some beautiful yet affordable real flower centerpiece ideas.


I was so lucky to find 5 cylinder vases at TJ Maxx for $8 a pieces which I think is a steal! So I am definately on the prowl for some bowl vases now because I am bound and determined to have these beautiful centerpieces at my wedding reception! Read more...
D.I.Y Friday~Button Napkin Rings
>> Friday, October 24, 2008

Once Wed and found these little gems, I love 'em.
Materials:
Fabric ( a 2” x 2” scrap for each button)
Cover Buttons ( 1 ½” in diameter, one per napkin ring)
Ribbon ( 6” length per ring, 1” wide)
Thread
Tools:
Scissors
Needle

Resources:
Fabric: “Leaf Honeycomb” by Joelle Hoverson and Moda “Green ButterflyLace” available at Purlsoho.comAll other supplies available and fabric and craft stores.
Directions:
1. Begin by ironing your fabric so it’s free of wrinkles. Follow theinstructions on the cover button package to create your buttons. Thereare several styles of cover buttons. With all, you’ll be cutting acircle of your fabric with their template, stretching the fabric over thetop of the button, then snapping the back on the button. ( see figure 1and 2)
2. Cut a length of ribbon 6 inches long. Run the ribbon through themetal loop on the back, so the finished button is centered on theribbon with the right side of the ribbon facing up. (see figure 3)
3. Pull the ends of the ribbon up so the right sides meet. The buttonwill be inside, facing up towards the ribbon ends. (see figure 4)
4. Approximately 1/4 of an inch from the ribbon edges, do a straightstitch to close the “ring”. Tie off your thread with a sturdy knot.Trim away loose threads. (see figure 5)
5. Turn the ring you just created right side out, so the button is ontop. Pull the ribbon through the metal loop of the button until the seamyou just stitched is directly beneath, and hidden by the button. (seefigure 6)
6. Make one napkin ring per guest. Mix and match your fabrics to livenup the tables. ( see figure 7)
Budget:
( to create one napkin ring)
Fabric - $. 03 (you can get almost 400 buttons out of a single yard of44” fabric)
Cover button - $.75 each
Ribbon $.20
Total Spent $.98 each
D.I.Y. Friday~ Fabric Fortune Cookie Favors
>> Friday, October 17, 2008

It's D.I.Y. Friday again and these favors are jut way too cute for words! A very talented e-friend (a friend I met through ebay) over at Brassy Apple had these fabric fortune cookie instructions that are not not only easy but can really be done on a budget. Find fabric that matches your wedding colors, preferably on the sales rack and go to work. For full instructions click here!

Read more...
D.I.Y Friday~Picture Fame Card/Comment Box
>> Friday, October 10, 2008
I was looking for a cute card box for the wedding, and came across this. It's a cardbox made with picture frames, how neat! Now you can put those engagement pictures on display in a unique way! It looks like it's super easy to make and I think I would even use it after the wedding just as a way to diplay our pics. I would just change out the card slip with a black piece of MDF or some other inexpesive material. Scoot on over to Road to the Aisle blog she has other great projects as well. This blog is a little old but it still has some cool DIY items in there!
D.I.Y Friday~More cute favor boxes!
>> Friday, October 3, 2008
I came across these cuties on Wedlog you can make these to match any wedding, you just need the right paper! I love the semi-circle top, it gives them a little whimsy feel! Stuff these with your favorite candies or cookies for your guests to take home! To full instructions click here!
Read more...
D.I.Y Friday~ Paper Flower Pomanders
>> Friday, September 26, 2008
How cute are these? I was surfing one of my favorite blogs (why have I not added them to my blog roll?) ...Once Wed and I came across these oh-so-cute pomanders. A pomander or sometimes refered to as a Kissing Ball is a round ball completely covered by flower blooms, in this case paper flower blooms. Flower girls carry them in the bridal procession or they are often used as wedding decorations. I fell in love with them because they are a clean and fairly inexpensive add to the wedding.


Find the directions here!
Read more...D.I.Y Friday
>> Friday, September 19, 2008
This is a new segment I thought I would try. I love making things and plan on making as much as I can for my wedding. I found these really cute favor boxes on the blog of a very talented and awesome children's designer/fabric designer/stationary designer's (she does it all she's awesome) blog. Her name is Patty and I found her about two years ago on Ebay. She makes items for my little girlies and I read her blog daily and she produced these cute little favor boxes for her sisiters wedding and I had to share! Click on the picture to get the full instructions!
HAPPY WEEKEND!


