Pro TEASERS!!!!!

>> Wednesday, March 31, 2010

The uber talented Sam Dean of Sam Dean Photogrpahy is such a tease! He emailed me a couple of teasers and let me just say OH-EM-GEEEEEEE I am beyond excited and cannot wait to see more! They are some gorgeous shot, the lighting is just perfect in everyone! THANK SAM!!!


Read more...

A Few NON-PROS......

>> Tuesday, March 30, 2010

No recaps yet because I am trying to rest but the day was beautiful and just what I expected (for the most part), couldn't have asked for anything more!

All Pics were taken by Chris Lee:
He didn't get any during the ceremony....


Read more...

Officially Signing Off!!!!

>> Friday, March 26, 2010

Well ladies...it is a day before our wedding and I wanted to officially sign off! I may check in on Saturday, but don't hold me to that. We are not going on a honeymoon so I will try to come on next week sometime with recaps. Eeeeek I cannot believe that I will be getting married tomorrow, I love him so much and can't wait to make it official.

Thank you all for your support and encouragement, it has meant more to me than you know. You guys have kept me going when I thought that I wanted to just throw in the towel and elope to Vegas! I couldn't have done this without you guys being here to root me on! Many blessings to you all and see you on the flipside :).

Cross you fingers that everything off without a hitch!

Read more...

{{Our DIY Programs}}

>> Thursday, March 25, 2010

Here are our programs...they were definitely a labor of love but well worth the effort because they turned out GREAT!! I used Charmeng's programs as my inspiration........ENJOY!


Read more...

Hair Trial

>> Monday, March 22, 2010

We are in the very last days of planning and getting ready to become a married couple, so posts will be very scarce, but I promise to catch you all up on everything and give all the deets after the big day!
I did however go for my hair trial last week and I will have to say that I was pleasantly surprised. My stylist Brandon, from Hair Attitudes rocked my hair out! I LOVE what he did to it and it turned out AMAZING!!!
Please excuse the shiny face, lol.....


Read more...

We are Licensed to Wed....

>> Thursday, March 11, 2010

We had to do the "traditional" wedding license photo. Obtaining the license was a fairly easy process...there was no line (woohooo for that), we filled out some simple paper work, showed our ID's and went on our way. Thank goodness we were not required to give blood because Mr. A would have passed out, he does not do well with needles!

We are getting so so so so close to our big day and we are both very excited and ready to roll!!


Read more...

Please Do Share...

>> Tuesday, March 9, 2010


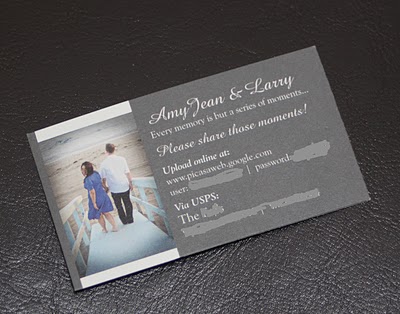
Here are our photo share cards, they are the standard business card size. I LOVE the final product, they turned out so great. I did not DIY these because I am just running out of time and to be honest if i had to d one more DIY I just might CRACK :) I ordered these from TinyPrints, they have such quality products and super quick shipping!

{FRONT}

{BACK}

A Few Other Inspirations for you guys::

Bee (BP Wedding) she is a DIY diva....love her!


Read more...

{{D.I.Y. Memorial Candles}}

>> Wednesday, March 3, 2010

Not having special loved ones there to celebrate your day with you can be really hard. So to memorialize those who are no longer with us I decided to again use an Ashley (Kholer44) D.I.Y. project, because I fell in love with how elegant yet simple her memorial table looked. So here are my memorial candles. They were very easy to make and took me less than 30 minutes.


Materials:

  • Vellum Paper
  • Thin Glue Strips
  • Ribbon
  • Small Cylinder Vases (I purchased mine at the Dollar Store)
  • Scissors

Directions:

  1. Lay out the design that you want on your Memorial candles in a program like Word or Adobe Photoshop.
  2. Next print your design making sure that you read the paper instructions to see what printer is safe for the paper (I used a laser printer).
  3. Next cut the paper to the right size and wrap the paper around the outside of the vase.
  4. Secure the two ends of the paper with a piece of thin glue strip.
  5. Next cut your ribbon to size and use the thin glue strips to secure the ribbon to the paper. (I ran my ribbon through my Xyron sticker machine)

I plan on using small LED lights to keep them lit throughout the night (I also purchased these at Dollar Store).

Read more...

  © Blog Design by Simply Fabulous Blogger Templates

Back to TOP