Showing posts with label D.I.Y Tutorials. Show all posts

::{{D.I.Y Tutorial}}:: Embossed Suite Signs

>> Wednesday, August 4, 2010
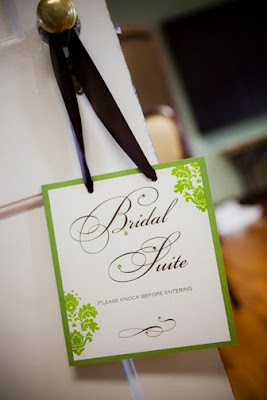
{CREDIT: Sam Dean Photography}

Materials::

  • 8 ½ x 11 Heavy Cardstock (cover weight)
  • 12 x 12 Cardstock
  • Xyron Adhesive Runner Glue (found in scrapbook aisle)
  • Size SS08 & SS10 Hotfix Flatback Rhinestones (artbeads.com)
  • Hotfix Tool
  • Rubber Stamp
  • Pigment Inkpad
  • Embossing Powder
  • Embossing Tool
  • Ribbon (7/8” or 1.5”)
  • Hole Puncher
  • Paper Cutter
  • Printer

Directions::


1. In Microsoft Word go to the INSERT tab and choose TEXT BOX. Bake a text box with borders the same size as the SAMPLE page. I am not sure of the exact measurement you will have to “guestimate.” Next create another text box and enter the word “Bridal,” you will then create the rest of the wording using the same process. {NOTE:: Be sure to create a different text box for each word so the boxes can be moved around the page to the desired layout}. Next be sure to double check your spelling, if all is correct it is time to print!


2. Now you are ready to cut out your sign…using a paper cutter of any kind be sure to cut inside or a little outside the black border. You want to be sure there is no black showing after you have cut out the sign.


3. It is time to emboss…ink your rubber stamp using the pigment ink pad and stamp it in the
desired position on the paper. Next pour a generous amount of embossing powder on the wet ink that you just stamped, tap off the excess back into the bottle. You will now need to use your embossing gun to heat and melt the powder until you get the shine that you are looking for.


4. Next you need to cut out your border paper (12x12 cardstock). Using a paper cutter cut the 12x12 cardstock down to 9x9. This will give the layering affect.


5. It is now time to glue your sign to the border paper using the Xyron Adhesive Glue Runner. Run the glue along all four edges of the sign. Next be sure the placement is correct because this is permanent glue and if you mess up and try to reset the sign, it will tear your background paper.


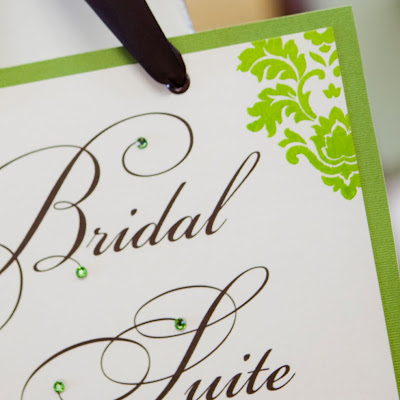
6. Next you add the crystals using the Hotfix tool and the Hotfix flatback crystals using the instructions that come with the tool. {NOTE:: Hotfix is a crystal that already has glue one the back and is then heated and adhered to the paper using a Hotfix Tool)


7. Once everything is assembled punch two holes in the top of the sign using the single hole-punch tool. Measure .25 inch down and 2.5 inches in on each side.


8. Last you will attach your ribbon. Cut a piece of ribbon about 14 inches long and string through the hole, tie the ends {NOTE:: Use a lighter to seal the ends of the ribbon to prevent fraying}.



Read more...

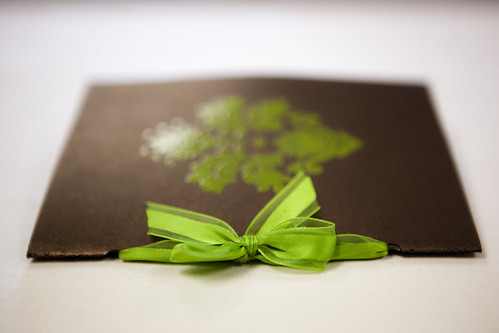
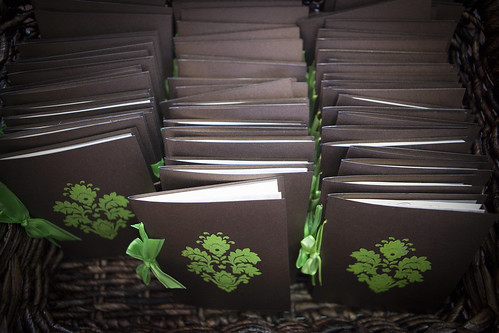
::{{D.I.Y TUTORIAL}}:: Enbossed Booklet Programs

>> Sunday, June 20, 2010


These Programs wouldn't have been possible without the inspiration from Chermeng.


:::{MATERIALS}:::

  • 8 1/2" x 11 Stardream 100lb. Heavy Cardstock
  • 8 1/2" x 11 Stardream 80lb. Coverstock paper (a little heavier than regular paper)
  • Vellum Paper
  • 3/16" inch hole puncher
  • 3/8" ribbon of your choice
  • Rubber stamp
  • Pigment Ink pad
  • Embossing powder
  • Embossing gun
  • Stamp-a-majig
  • Paper Creaser
  • Lighter
  • Printer
  • Scissors
  • Paper Cutter
  • Double Sided Tape
  • Vellum Envelopes
  • Kleenex
  • Circle labels or stickers

:::{DIRECTIONS}:::

  1. First cut your heavy cardstock in half horizontally using the paper cutter. Each program will turn out to be 4.25" x 5.5" folded, so keep this in mind when buying your paper so that you do not over buy.
  2. Next using your rubber stamp, dip it in the pigment and stamp the from cover of your program using your stamp-a-majig (will help you center your stamp on the cover).
  3. Next cover the wet ink with a generous amount of embossing powder, then tap the excess powder back into the jar so that you can reuse the powder instead of wasting it.
  4. Use the embossing gun to heat the ink and powder, the stamp will become smooth as the embossing gun heats and melts the powder.
  5. Next lay out each page of the program in a software program like Microsoft Word or Adobe Photoshop (I chose Photoshop). Keep in mind that you can print two program pages one sheet of paper.
  6. I chose to print a cover sheet type page on the vellum paper. Make sure you read the directions for the vellum paper, making sure its made for the type of printer you are using (Make sure your hands are clean of any oils or lotion because they can leave a residue on the paper). After you have laid these pages cut them in half horizontally like you did the cover page.
  7. Next lay out the other pages (my pages included a picture page, poem page, Order of Ceremony page, Wedding Party page & Thank You/Memoriam page) and cut them in half horizontally. Keep in mind that you can print front and back by turning it over and printing the other page on the back.
  8. Put all the pages together with the cover page first, the vellum, the picture page, the poem page and using your paper creaser, fold all page in half and crease the edge.
  9. Use your hold puncher to punch holes in the crease 1" from the top and 1" from the bottom
  10. Cut a piece of ribbon about 14" long and feed it through the holes from the inside of the program. Tie a bow on the outside of the program and use a lighter to melt the edges of the ribbon to keep them from fraying.
  11. Next stuff two Kleenex tissues inside the small vellum envelope and close with your custom label or sticker and add to the inside cover of your program using the double sided tape.
  12. You are done! I worked very hard on these programs and worked hard on making these step-by-step instructions for you lovely ladies, all that I ask in return is if you repost this tutorial you link it back to my blog and all pictures are property of My Dream Ring/Life and if you use any of them please also link back to my blog. Thanks so much, ENJOY!

Read more...

  © Blog Design by Simply Fabulous Blogger Templates

Back to TOP